The wings have been treated to an oil wash and are ready for decal placement.

A bit of dry fitting here to see if the if the wing roots fit into the fuselage.

The wing fold mechanism is also treated to an oil wash to bring out the details.

The tail section panel lines and rivets are also washed.

Wash complete!

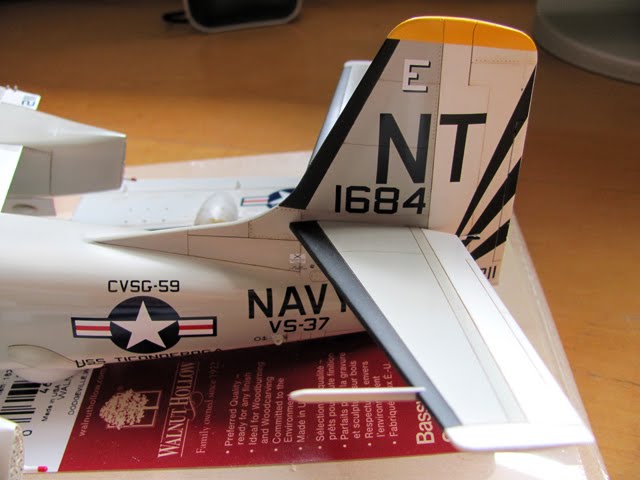
Start decal placement.

I like Kinetic's way of making their wheels. The wheel hub and tires come as separate parts. So you can paint them separately. I first paint the wheel hub white and tires with "Tire Black". Then I glue the wheel hub in place and glue the tire halves together. I then sand away the seam line between the tire halves. After that I roughly cut out round shaped masking tape (pictured below) to cover the wheel hub as I air brush the "Tire Black" onto the sides of the tire after sanding away the seam lines.

The wheels are glued to the strut and the landing gear is then glued onto the gear bay beneath the engine.

Using red paint, I commence free hand painting of the landing gear door edges.

A bit of the red paint gets "leaked" to the front...

A bit of light sanding should be able to remove it.

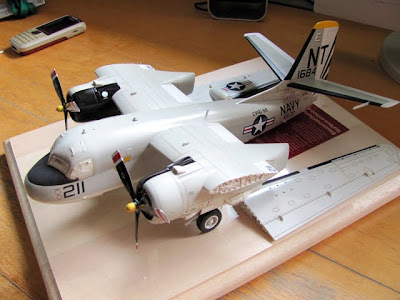
Decal placement almost complete. I bought the wooden base from an art shop. I will place the model on the wooden base. As you can see now, the model is a tail sitter. All that blue tac and artificial rocks were of no use :(


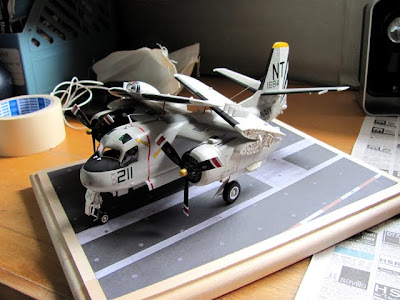
Nose landing gear goes in, together with the gear doors. I also complete all the decal placement at this stage.

I managed to prop the tail up using a clear plastic tubing placed at the back of the model. After decals are dry, I proceed to air brush Flat Clear lightly over the entire model to make the whole thing slightly less glossy.

Once that's done, the masking tape on the windows are finally removed.

The carrier deck is just a simple printout on A4 paper and pasted onto the wooden base.
Fishing lines were used to make these antenna wiring.

The model is complete!

 A bit of dry fitting here to see if the if the wing roots fit into the fuselage.
 The wing fold mechanism is also treated to an oil wash to bring out the details.
 The tail section panel lines and rivets are also washed.
 Wash complete!
 Start decal placement.
 I like Kinetic's way of making their wheels. The wheel hub and tires come as separate parts. So you can paint them separately. I first paint the wheel hub white and tires with "Tire Black". Then I glue the wheel hub in place and glue the tire halves together. I then sand away the seam line between the tire halves. After that I roughly cut out round shaped masking tape (pictured below) to cover the wheel hub as I air brush the "Tire Black" onto the sides of the tire after sanding away the seam lines.
 The wheels are glued to the strut and the landing gear is then glued onto the gear bay beneath the engine.
 Using red paint, I commence free hand painting of the landing gear door edges.
 A bit of the red paint gets "leaked" to the front...
 A bit of light sanding should be able to remove it.
 Decal placement almost complete. I bought the wooden base from an art shop. I will place the model on the wooden base. As you can see now, the model is a tail sitter. All that blue tac and artificial rocks were of no use :(

 Nose landing gear goes in, together with the gear doors. I also complete all the decal placement at this stage.
 I managed to prop the tail up using a clear plastic tubing placed at the back of the model. After decals are dry, I proceed to air brush Flat Clear lightly over the entire model to make the whole thing slightly less glossy.
 Once that's done, the masking tape on the windows are finally removed.
 The carrier deck is just a simple printout on A4 paper and pasted onto the wooden base.
 Fishing lines were used to make these antenna wiring.
 The model is complete!
No comments:
Post a Comment